Multisite Transfers – Best Practices
Transfers are a key piece of POSIM’s multisite integration, and making sure that your local POSIM settings at each site are correctly configured will greatly improve the consistency and reliability of inter-store transfers. Below are the recommended POSIM settings to select for best results with multisite transfers:
1. Transfer Options
To configure transfer options, navigate to Administration > General Preferences > Transfer Options. This section features a list of transfer posting requirements, which prevent the user from posting a transfer until the checked items are resolved. Check the box for any field to be required before posting.
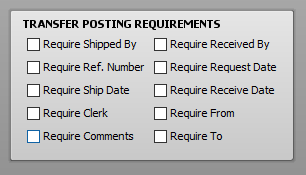
For best results with multisite transfers, check the following:
- Require From (ensures that a sending store must be selected before posting a transfer)
- Require To (ensures that a receiving store is selected before posting a transfer)
- Require Shipped by (requires the user to fill out who is posting the transfer prior to posting)
Since multisite transfers will not post through to their intended destinations without a proper from and to destination, it’s highly recommended to require these two items at minimum before posting.
2. Transaction Numbering
To configure transaction numbers for transfers, navigate to Administration > General Preferences > Transaction Numbering. To change the numbering for transfers:
- Select Transfers from the Card dropdown menu.
- Check the Apply Defaults to All Workstations checkbox.
- In the field next to Prefix pick a two-letter prefix that is unique to this individual store (unique transfer IDs for each location are required for multisite to function properly)
- Type a number (typically six digits — 000001) into Next ID for POSIM to start with when generating IDs for new transfers.
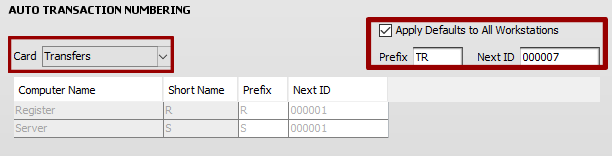
Select a unique transfer prefix for each of your store locations. This is required to ensure proper transmission of transfers across multsite.
3. Posting Transfers
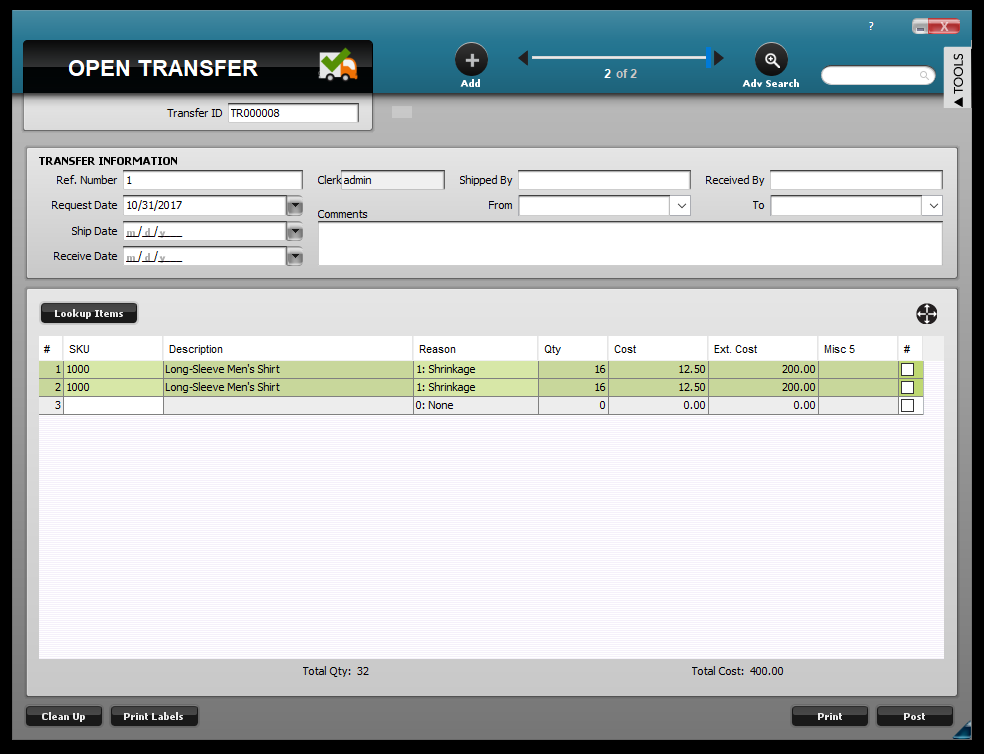
To post a new transfer, navigate to Inventory > Transfers > Open Transfers.
- Click the Add button to create a new transfer.
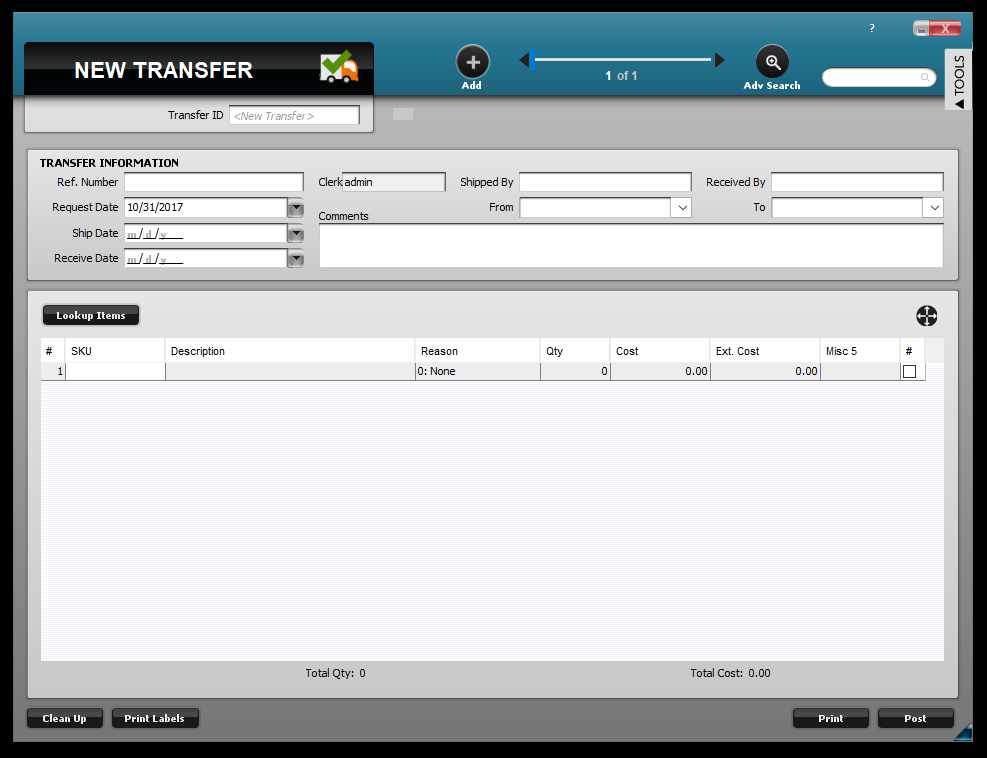
A new transfer.
- Fill out all necessary transfer information
- Use the Lookup Items button to search for items to transfer, or add them to the transfer manually by typing or scanning their identifiers into an open SKU field.
- If this is an outgoing transfer, QTY needs to be negative for all items. If there is a positive qty for any line on the transfer, it will not post through to its destination.
- Before posting, ensure that the desired From and To fields are selected.
Transfer will not post across multisite without from and to selected.
- Click post to send the transfer.
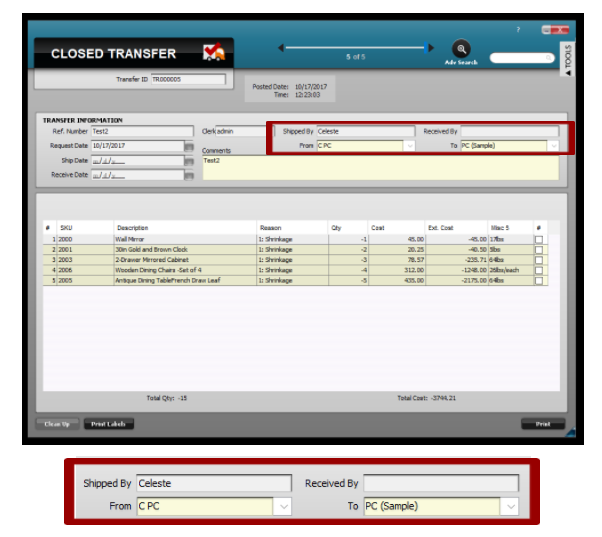
4. Receiving Transfers
When a transfer from another store posts across multisite, it will appear in the receiving store under Inventory > Transfers > Open Transfers. To receive a transfer:
- Use the arrows at the top of the screen to scroll through available open transfers.
- Verify that the items being received into inventory are correct (incoming items will have a positive quantity).
- Click Post to bring the transferred items into inventory.
Verify the open transfer before clicking Post to finalize. - After posting, a print preview of the transfer will appear.
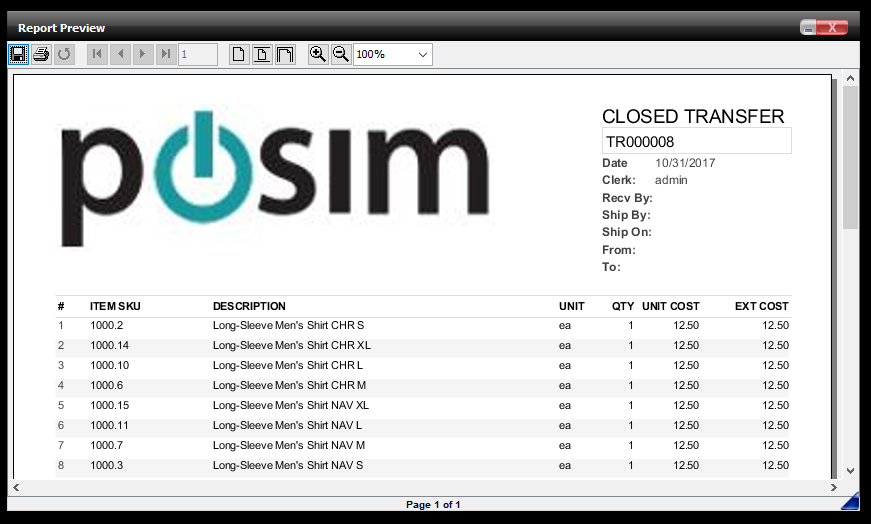
Preview of transfer printout after posting.