Remote Sales in POSIM
The following information is a quick guide on remote sales. If you have further questions or need assistance with remote sales, please contact support@posim.com or call 800.553.9314 to speak with a tech support representative.
Remote sales provides users the ability to process sales outside of the retail store. By taking a copy of the store database off-site, item information, such as price and inventory levels can be accessed. With remote sales, new customers can be added at a trade show or event, and that information can be transferred back into the store database after returning from the off-site event.
Here are a few things to consider before using remote sales at an event or trade show:
- Will the event have wifi accessible? If yes, will there be a fee for use?
- Is the tax rate at the event different than my retail location? If yes, what are the tax rates?
- How will credit cards be processed at the show? Please note: A strong internet connection is required to process credit cards using PayStream.
- What hardware will need to be taken to the event? (Receipt printers, barcode scanners, etc.)
Remote Sales Initial Setup
Before leaving for the event, take the time to set up the remote computer(s) that will be taken to the event. When everything is set up and has been tested, confirm that sales tax, invoice numbering, hardware, etc., function as intended.
- Set up sales tax
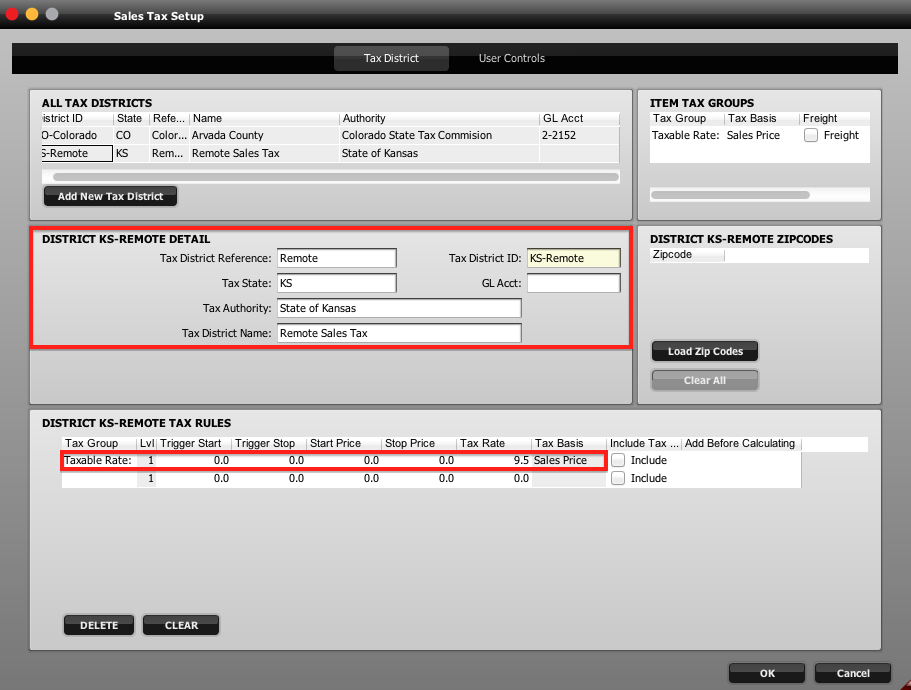
If the sales tax rate for the remote location is different than the rate charged at the retail store, add the new tax district to the live database before setting up the remote database. For the sales invoices from the remote event to import back into the live database correctly, the tax district must exist in both databases; even if this tax district might never be used in the retail store or used again at any future events.
- Backup the database
Take a backup of the live database. Learn more about backing up the database. - Install POSIM on the remote computer
Install POSIM as a server on the computer that is being taken to the event. Learn more about installing POSIM as a server on Mac or Windows. - Restore a copy of the live database onto the remote computer
Restore a copy of the live database onto the remote computer. This is the copy that was created in step two of this instructional guide. Learn more about restoring a database. - Verify credit card processing
Know ahead of time how credit cards will be processed at the event. If software is needed, such as PayStream 4, make sure to setup and test PayStream ahead of time. - Check hardware
Set up and verify the hardware that is being taken to the event. Verify that all drivers are installed and the hardware is working properly. - Set up customer and invoice numbering
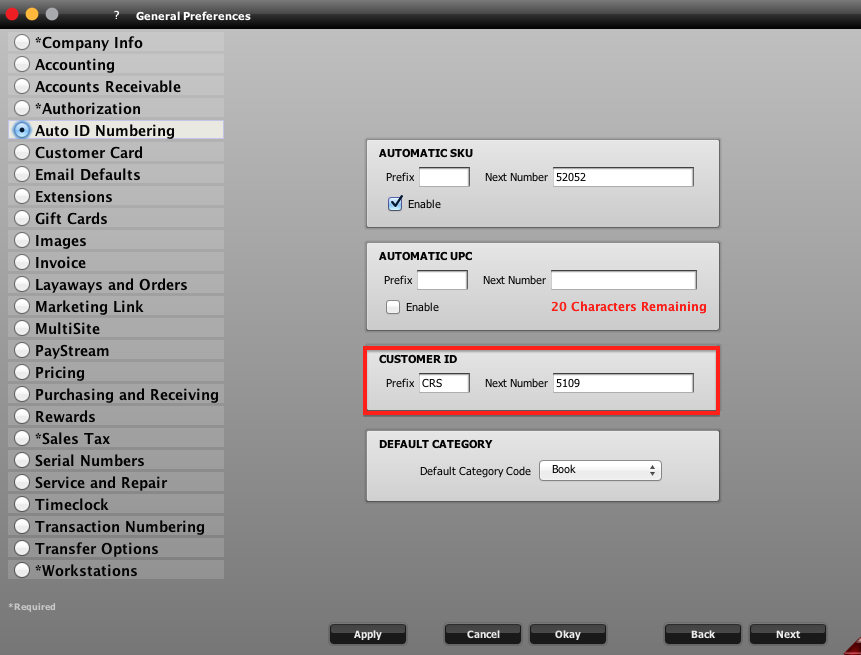
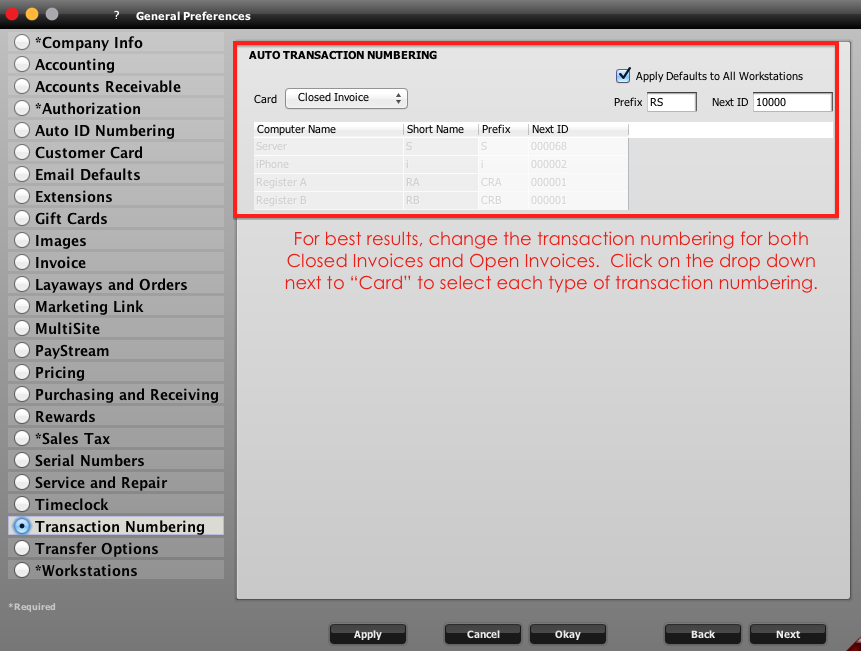
To prevent the occurrence of conflicting IDs when sales from the event are imported, POSIM recommends users change customer and invoice numbering in the remote database. If customer cards are added at the event, it is imperative to change the customer numbering in the remote database before sales are posted. If invoice numbers have a conflict, there is a way to append invoice ID’s with information later. However, some users prefer to set up invoice prefixes to indicate the event where sales were processed.
Processing Sales at the Event
Now that all the pre-show setup has been completed, sales can be processed at the event. These sales will be processed just the same as if customers were shopping in the store. However, there are certain transactions that are not supported with remote sales. See below for a list of the transaction types:
| Supported Transactions | Unsupported Transactions |
| Sale | Return To Vendor |
| Return | Special Orders |
| Labor | Layaways |
| Misc | Drop Ship |
| Subtotal | Gift Cards |
| Comment | |
| Non Comment | |
| Payment on Account | |
| Events |
When sales have been completed from the event, invoices will need to be exported and then imported into the live database.Export Sales from the Show
- Open Remote Sales in POSIM on the remote database. (Navigator > Administration > Remote Sales)
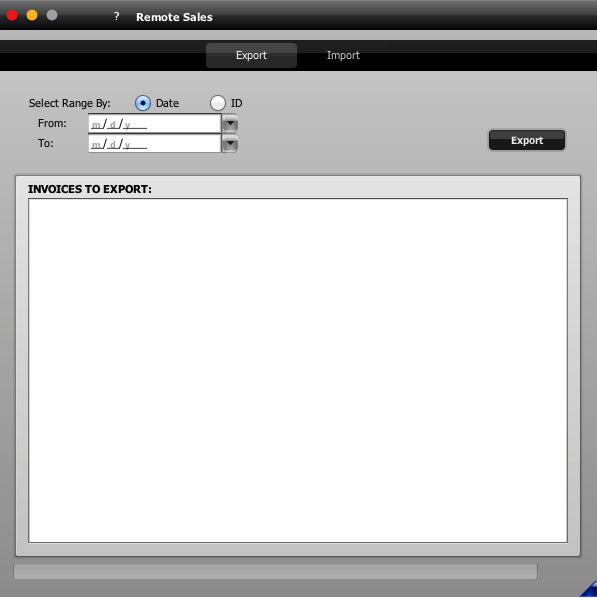
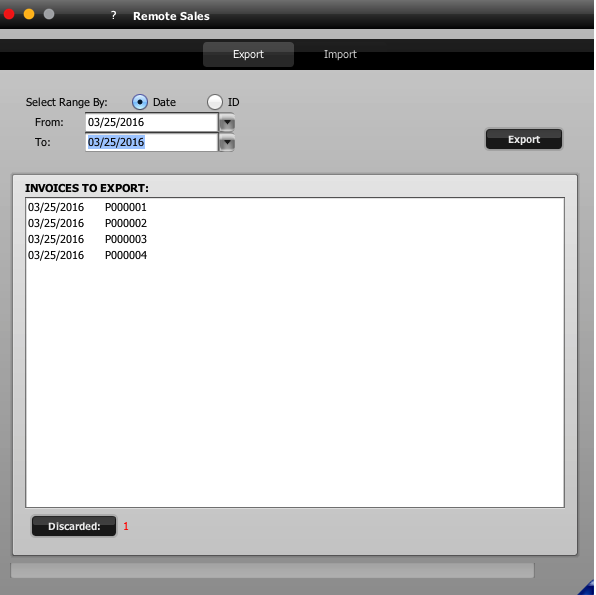
- Click on the Export tab on the window. Choose either a Date Range or Invoice ID range to complete the export. Then fill out the From/To fields with either the Dates or Invoice IDs for invoices created at the event. Once the From/To range has been entered, the “Invoices to Export” window will automatically populate with a list of closed invoices found within that range. In the preview window, a full list of all the invoices within the specified range will be displayed.
Note: If there were any invoices that used an unsupported transaction or payment method a”Discarded” button will appear, click the button to view these invoices. An explanation of why the invoice(s) were discarded will appear.
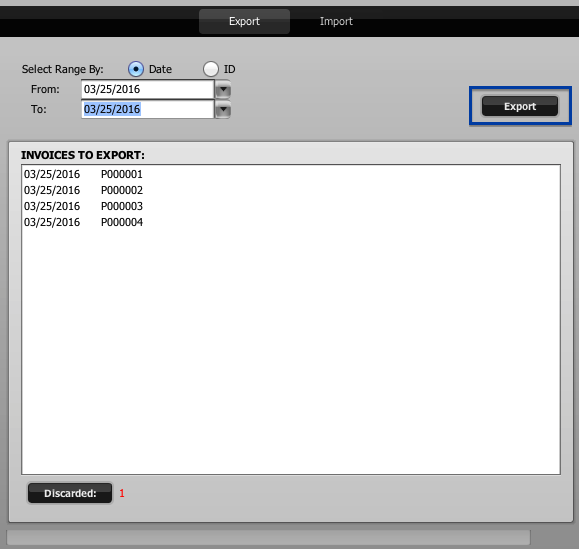
- Verify the list of invoices to export, then, click the “Export” button.
- When the “Export” button is selected, a prompt will appear. Choose a location to save the exported file and then press Save. The file will be exported as a .xml file.
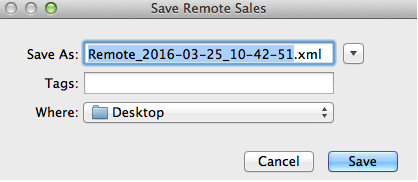
- Transfer this file to the live POSIM Server. This file will be used to import invoices that were processed at the event into the live POSIM database.
Import the sales to the live database
Before remote sales are imported into the live database, take a backup of the live database. The backup may be needed in the unlikely event that the database needs to be restored to its original state prior to the import.
- Open Remote Sales in POSIM on the live store server. (Navigator > Administration > Remote Sales)
.
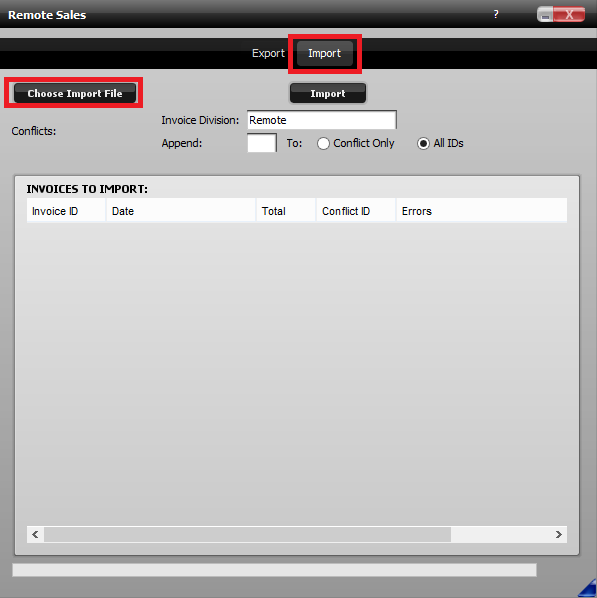
- Select the Import tab at the top of the window. Then select “Choose Import File.”
- Locate the file that was previously exported from the remote computer
.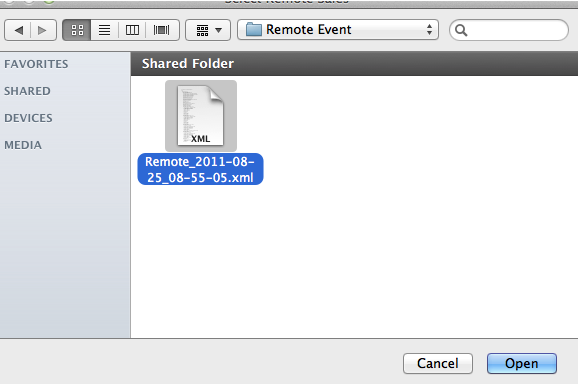
- Once the file has been located, choose the file and press Open. Invoice data will be displayed in the “Invoices to Import” window.
Please note: invoice division may be entered into the “Invoice Division” field for tracking and reporting purposes. When an invoice division is added, the invoice division will appear as the Division on the closed invoice. Including an invoice division will provide the ability to filter or group by the invoice division when running a Sales Report.
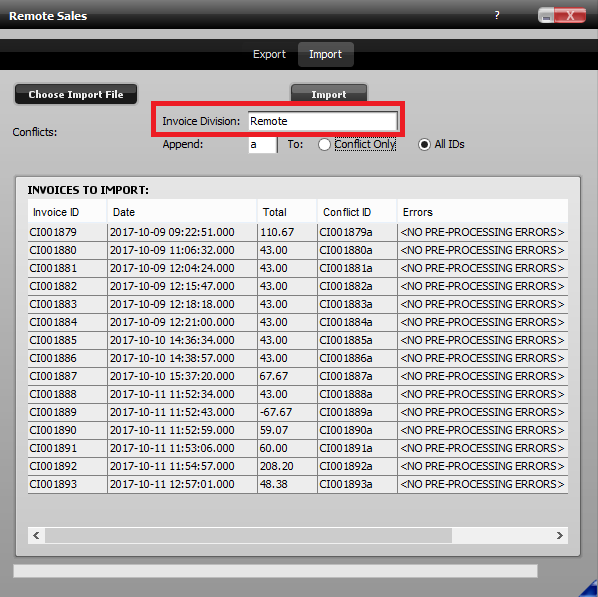
- Preview the information to check for any pre-processing errors.
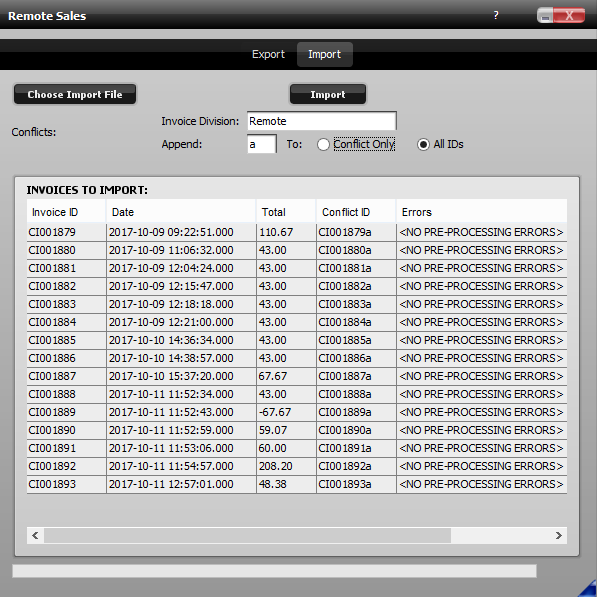
- After the invoices to import have been reviewed, select the “Import” button to begin importing. A notification will appear to notify the user that a backup is recommended before proceeding.
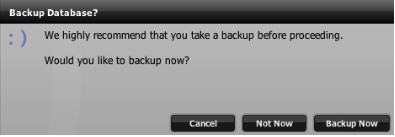
Select Cancel to go back to the Remote Sales screen and cancel importing.
Select Not Now to forego taking a backup at this time and proceed with importing.
Select Backup Now to proceed with taking a backup before importing.The importing will begin and a progress bar will appear. When the import is complete, a message will appear stating that the import finished.

- Verify the import was successful by checking the Closed Invoices and running a Sales Report.If there are any errors found during the import, a message will appear with a description of the error. The most common error that occurs is when one or more invoice ID’s from the show already exists in the live database. If this occurs, simply select the “Append ID’s” option and insert text to append to the invoices and select the Import button. Example: Enter “RS” in the text field to indicate Remote Sales. NOTE: If there were errors found during the export due to unsupported transaction types, those invoices will need to be manually entered into the store database at this time.