Tills and End of Day Procedures
This guideline will provide an overview and explanation of the recommended steps for end of day procedures for POSIM users.
Ending Tills
- POSIM’s ending tills module is located under Sales > Utilities > Ending Tills.
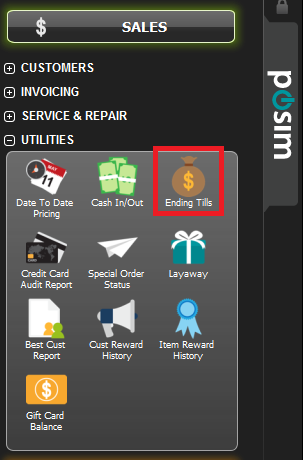
Ending tills is located in POSIM’s sales section, under utilities. - Ending tills allow for reconciliation of funds at the end of the business day for each cash register in the store.
- To ensure accurate tracking of incoming and outgoing sales numbers, run ending tills at the end of every business day that sales are posted.
- Ending tills will need to be finalized after the last posted invoice for the day. If tills have been run prior to posting another sale, funds from those sales will not be recognized retroactively. In this case the tills will need to be run again and recalculated to account for any transactions posted since the first till was run for the day.
- Ending tills can be run for all registers in the store, or for each individual clerk or computer.
- To run a new till, make sure the effective date is set to the current date and select OK.
- To check a prior day’s till, set the effective date to the desired day and click OK. Note that changes to a prior day’s till can affect drawer and deposit amounts for later dates.
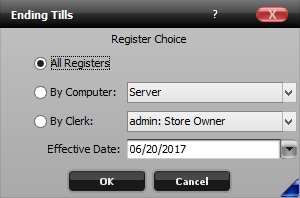
The initial ending tills window. Tills can be run for each register, each clerk, or for all registers at once.
The Ending Tills Window
Click OK after selecting a workstation and specifying the effective date to be taken to a new window that will display the following:
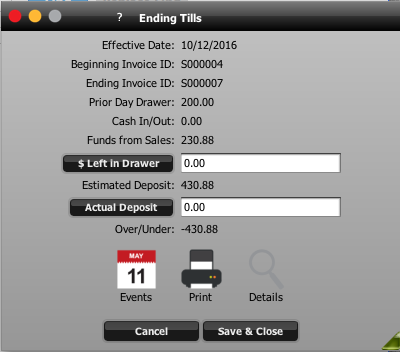
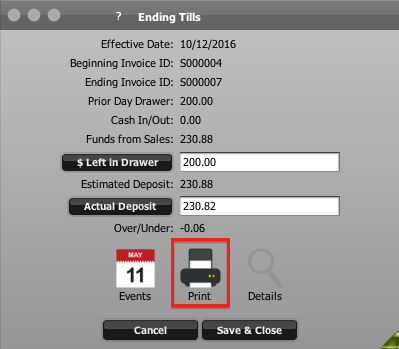
Effective Date: This is the date that the tills are being calculated for. This was specified in the initial tills window.
Beginning and Ending Invoice ID: These fields list the first and last invoice included in the till. Note that if the tills are run by computer or by register, the first and last invoice will show as the beginning and ending invoice for that clerk or register.
Prior Day Drawer: This is the amount that was in the till at the beginning of the day, and corresponds directly to the Left In Drawer amount for the last day the tills were run.
Cash In/Out: If cash was taken in or out using the Cash In/Cash Out utility, the amount will be automatically recorded here.
Fund From Sales: This field shows the amount to be included in the deposit for the day. This will represent a total of the payment methods checked in the Ending Tills Detail window. Only payment types that physically enter the drawer should be checked in this window.
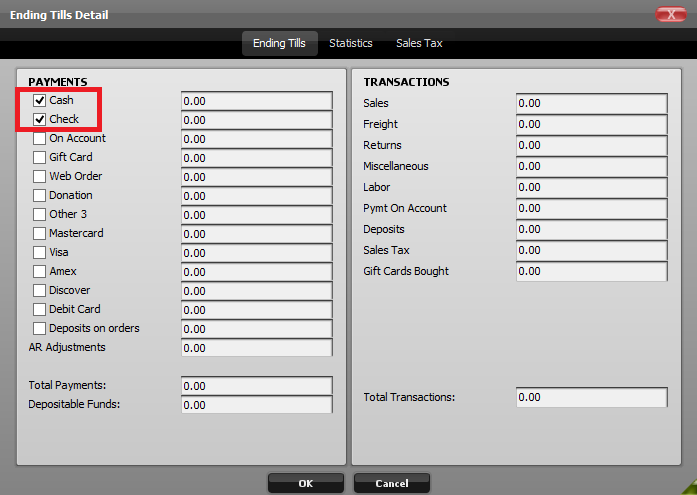
Cash and check (physically collected payment types) are the only payment methods checked in the Ending Tills Detail window.
$ Left in Drawer: This is the money being left in the till for the next business day. Clicking the button will open the Ending Tills Cash Counter window. Using this window is not required, but the feature is there to help the clerk maintain an accurate count of all bills and coins in the drawer. After the clerk clicks OK, the total from the cash counter will be automatically entered into the $ Left in Drawer field.
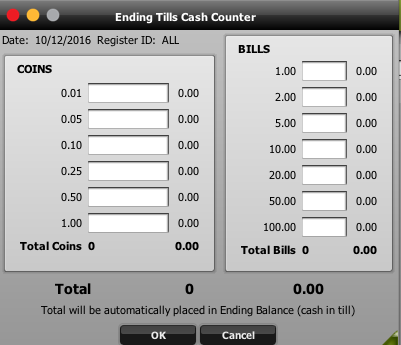
Use the cash counter window to assist in counting bills and coins.
Estimated Deposit: This field is calculated by adding the prior day’s drawer and funds from sales amount, and subtracting the amount left in the drawer.
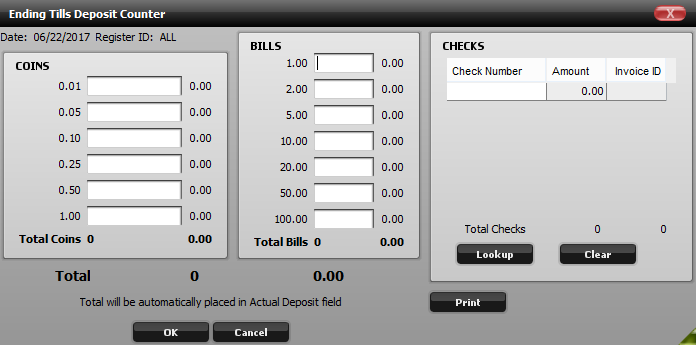
Actual Deposit: This field is for the remaining drawer funds (not left in the drawer) which will be taken to the bank for deposit. Clicking on the actual deposit button will bring up the ending tills deposit counter – which, like the cash counter, lets you enter and calculate the number of bills and coins being taken out of the drawer for deposit. Checks numbers and their amounts can also be tallied from this screen.
Over/Under: This field is calculated by subtracting the Actual Deposit amount from the Estimated Deposit amount. It displays any discrepancies between the funds POSIM has calculated for deposit vs. the funds actually being taken out for deposit.
Print: After ending till numbers have been verified, use the print button to print a copy of the day’s till.
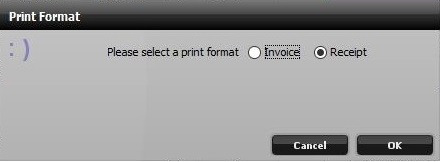
Print Format: Choose the printing format. Invoices will print on 8.5 x 11 paper. Receipts are designed to print to a Star receipt printer. The option selected here will be retained the next time the tills are printed.
Force Recalculate: If sales have been posted after the tills were run for the day, or the tills need to be recalculated for any reason, it may be necessary to manually recalculate the tills. This can be done by editing the $ Left in Drawer or Actual Deposit field, or by using the Ctrl + Shift + R key combo. Recalculating the tills will cause POSIM to re-examine the day’s invoices and set the current actual deposit and left in drawer numbers back to zero.
Details: The Details button on the Ending Tills screen will pull up a new window providing a more thorough explanation of what is contained within your daily tills. There are three tabs in this window. Click on each tab to view.
Ending Tills: This tab provides a breakdown of the different method of payments and shows you how much money was paid with each different method of payment. It also displays the different transaction types and the amount that used for each transaction type.
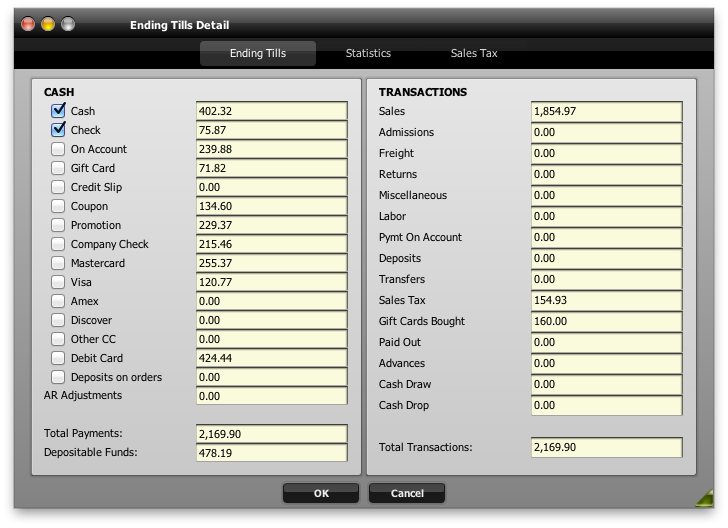
Ending Tills tab
Statistics: The Statistics Tab will provide general information and statistics for that particular day.
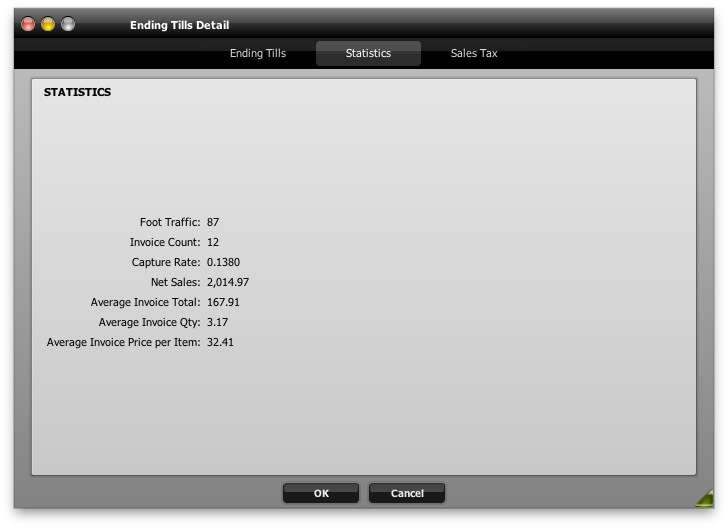
The statistics tab
Sales Tax: The Sales Tax Tab shows reportable and exempt sales tax information to provide record of the sales tax collected for the day. The information is broken up into sales tax groups, and then whether sales were taxable or exempt.
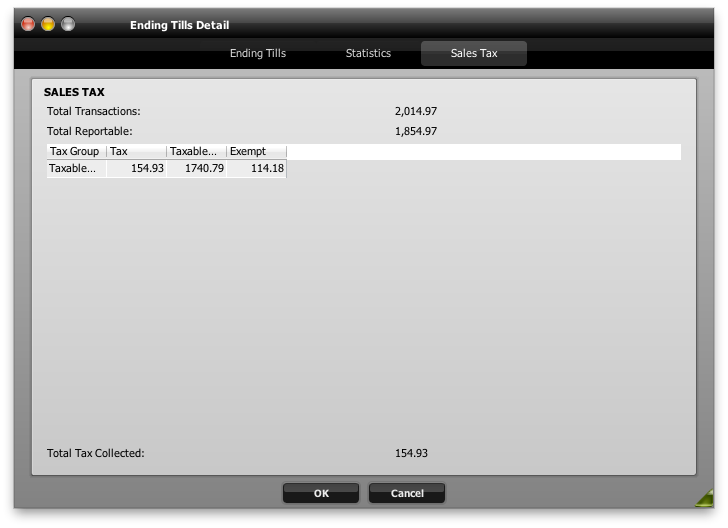
Sales Tax tab
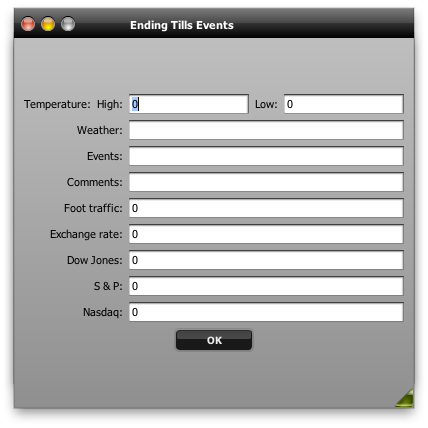
Events: On the Ending Tills window is an Events Button. The events window can be used to record various pieces of information about the day. Using this window is completely optional.